
Today, I did a few experiments with the upscaling methods. I know at least 3, so let’s look for the configurations and results, and as a summary, let’s select a winner.
Let’s start with the base image generation.
I used the next model and settings
- Checkpoint: cyberrealistic_v42 (SD 1.5)
- Sampling method: DPM++ 2M
- Sampling steps: 20
- Size: 512×512
- CFG scale: 7
- Positive prompt
- 1women, half body, looking at viewer, smiling, (lips closed:1.1),
- casual look, black trousers,(black blazer:1.4), (white blouse:1.4), standing in the office, 1necklace, earnings,
- hand in the pocket, (large hips:1.2), long curvy blonde hair, makeup, lipstick
- Negative prompt:
- empty
- Seed: 2028508215
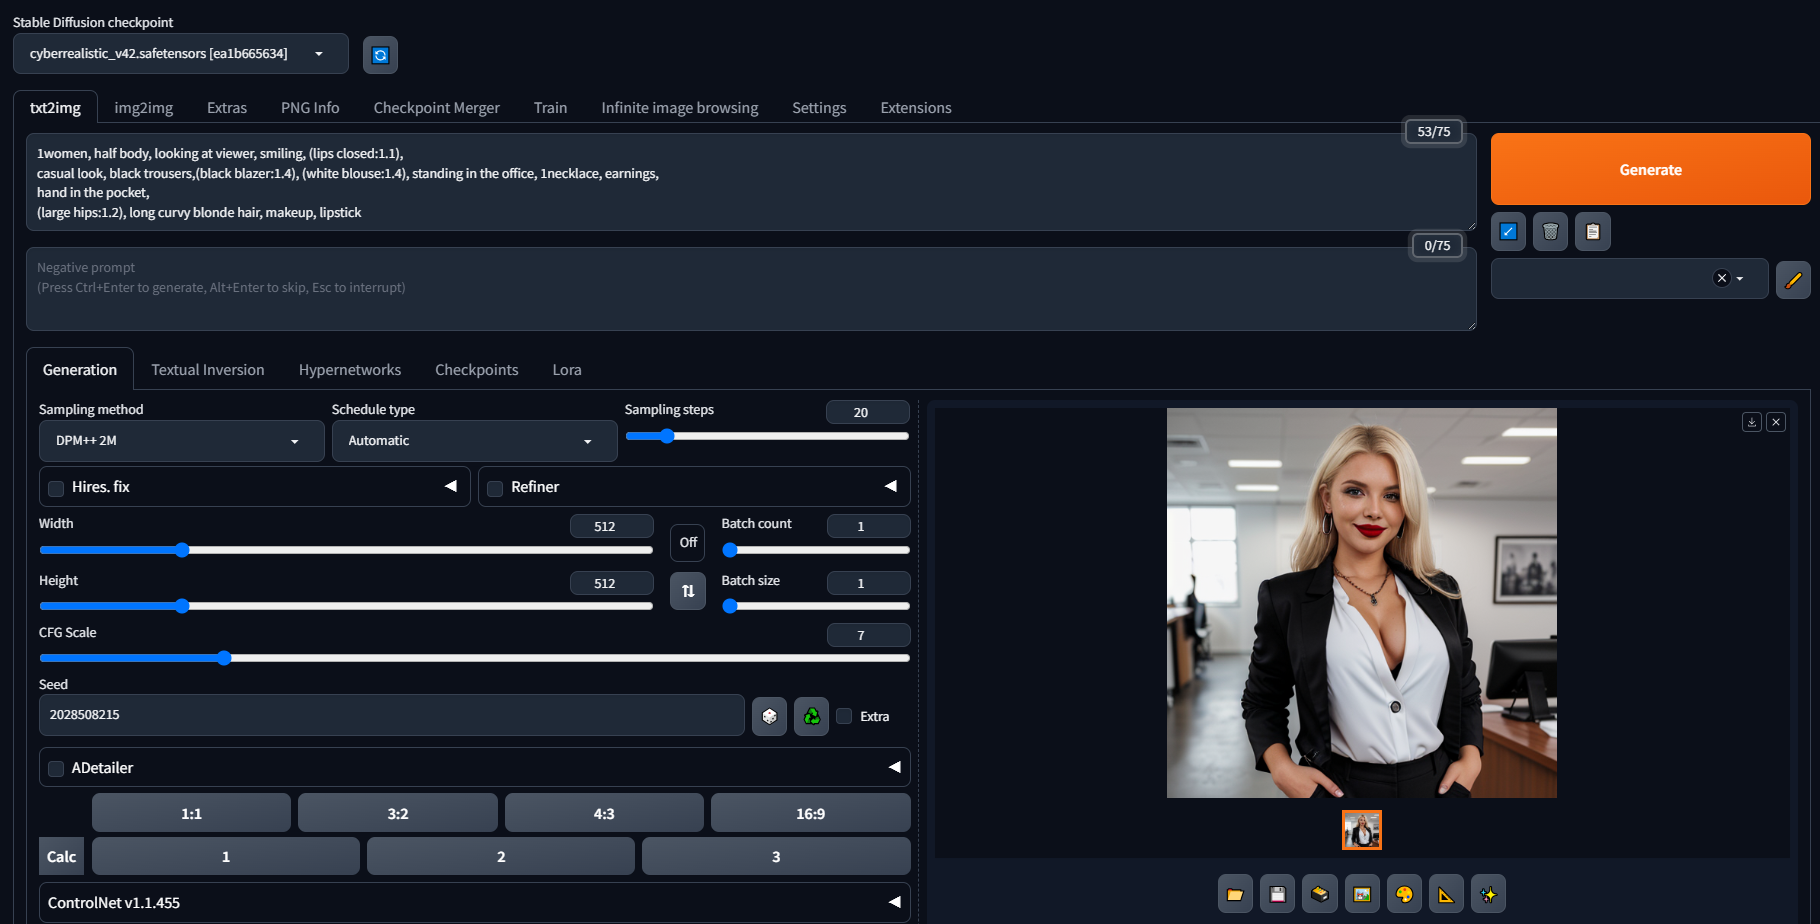
Here is the result

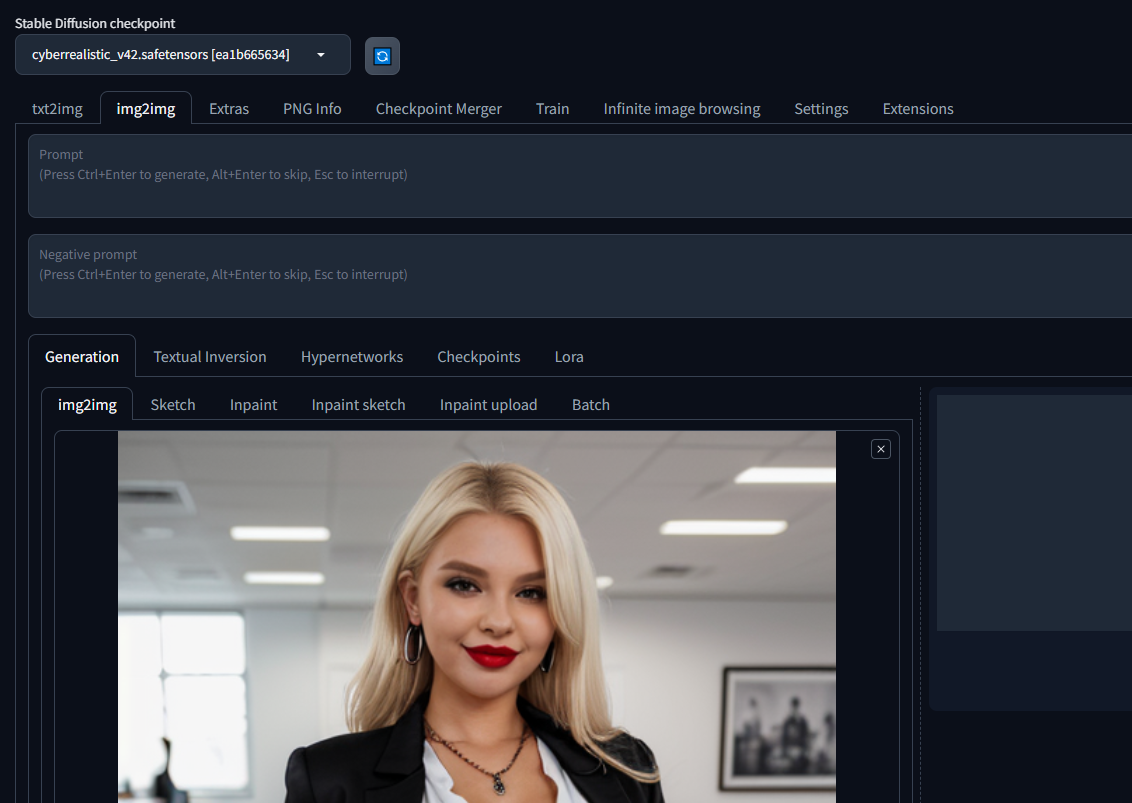
The next step is to enable ADetailer to fix eyes and fingers a bit. I want to do this to be able to compare the results with it and without it
ADetailer
- 1st: face_yolov8n.pt model
- 2nd: hand_yolov8n.pt model
- other settings are set as default
Here is the result

The face was not changed significantly, but the nails on the fingers were fixed. So let’s keep it.
Now, let’s switch to the upscaler method 1 – It’s Hires. fix that we can found only on txt2img tab.
I will use two upscalers, just for the comparison.
- 4x Ultrasharp V10
- NMLD CiaxCX 200k
Txt2Img upscaling method – HiRes. fix
Settings
- Upscaler: “4x Ultrasharp V10” / “NMLD CiaxCX 200k”
- Hires steps: 40
- Denoising strength: 0.3
- Upscale by: 2
I decided to set Denoising strength to just 0.3 (0.7 by default) to decreased image details modifying, but I increased Hires steps to 40 to keep quality

Result, upscaler “4x Ultrasharp V10”

Result, upscaler NMLD CiaxCX 200k

In my opinion “NMLD CiaxCX 200k” is a winner in this round; the skin looks more natural.
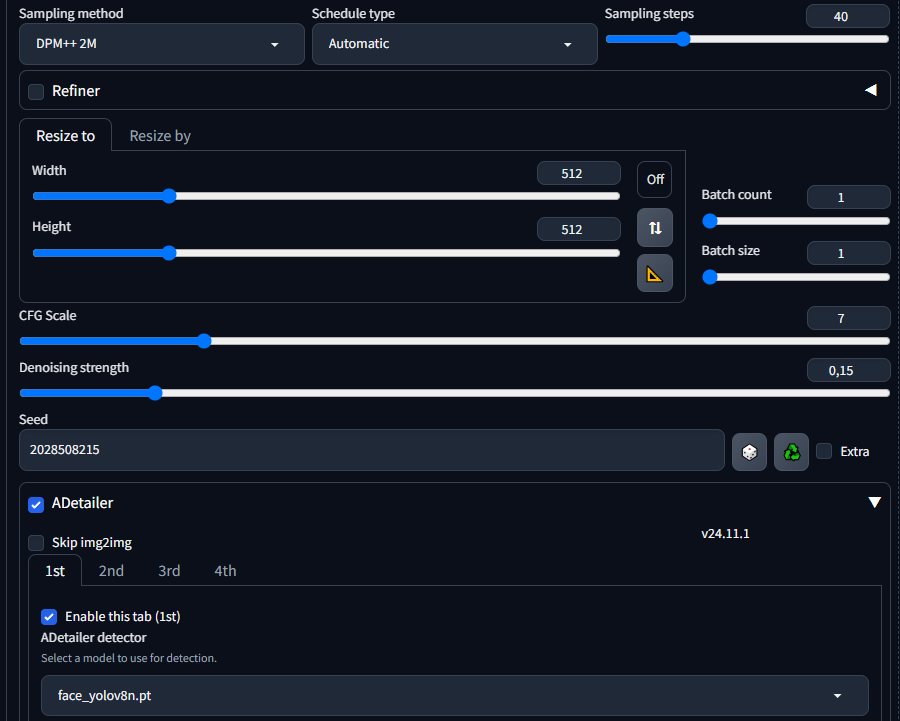
Img2Img upscaling method – SD upscale
Now, let’s try to do the same, but as a source let’s take an image 512×512 and use the same upscalers
I didn’t use any prompts
And left default settings except of
- Seed: 2028508215 – the same as during image generation
- Denoising strength: 0.15 – to keep image the same
- Sampling steps – 40 – this is needed as the denoising strength is low
As previously, I turned on ADetailer with face_yolov8n.pt and hand_yolov8n.pt models.
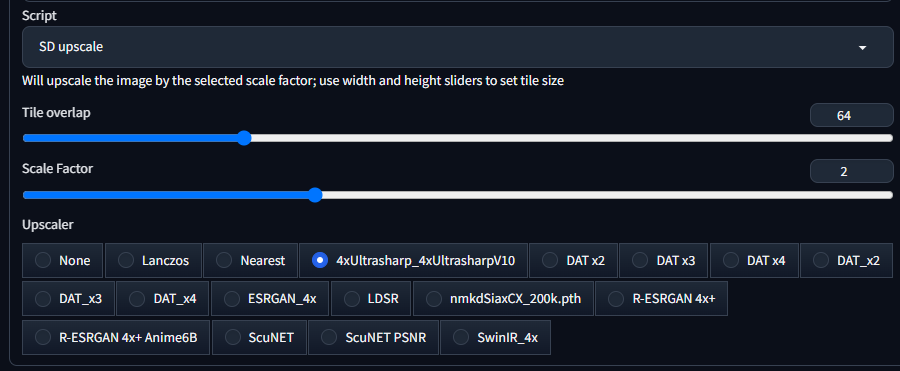
Now the upscaler configuration
- Script: SD Upscale
- Tile overlap: 64 (increase this if you have bigger source image)
- Scale factor: 2
- Upscaler: “4x Ultrasharp V10” / “NMLD CiaxCX 200k”
Result, upscaler “4x Ultrasharp V10”

Result, upscaler “NMLD CiaxCX 200k”

In this round, I think “4x Ultrasharp V10” won, as his image has more details on the hair and ears and better results on the eyes.
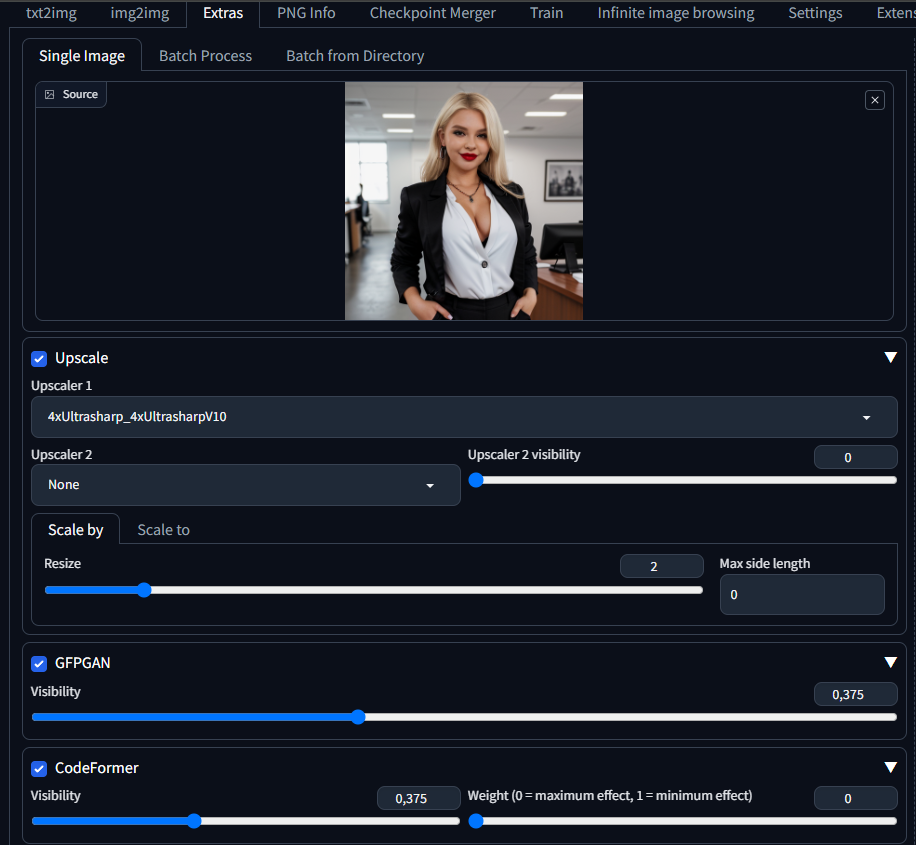
Extras upscaling method
This is the third upscaling method, which only resizes the pixels. However, we can tune the results with the GFPGAN and Codeformer methods, which do something similar to ADetailer but only with the face.
So, let’s again take a 512×512 image as a source and apply the next settings
- Upscaler: “4x Ultrasharp V10” / “NMLD CiaxCX 200k”
- Resize: 2x
- GFPGAN visibility: 0.375
- CodeFormer: 0.375
Result, upscaler “4x Ultrasharp V10”

Result, upscaler “NMLD CiaxCX 200k”

Result are very similiar, but in this round, I think “NMLD CiaxCX 200k” is a winner because of the realistic skin texture.
Conclusion
I like both upscalers, but their results significantly depend from your usage scenario.
But let’s talk about upscalers methods, as you can see from examples the best is “Hires.fix” but it can be applied only for the new image. If you generate new image you probably need to choose “Hires.fix” and “NMLD CiaxCX 200k” upscaler. If you work with the existing image or old photo, it Ok to use “SD upscaler” and “4x Ultrasharp V10” upscaler, but this scenario requires a lot of other sensitive tunings to keep the image close to the original. And the last one is an upscaling method located on the Extras tab, which is just a zoom on steroids, not bad for the images that already have a lot of details and need to be scaled from the bigger size, eg not from 512, but from 1024+ to 4k, for example.
So the short answer is
- if you generate a new image, use “Hires.fix” + “NMLD CiaxCX 200k”
- If you resizing the image or need to improve quality, use “SD upscale” + “4x Ultrasharp V10”
- If you have a good-quality image, but just need to resize it to a bigger size, use “Extras upscaling” + “NMLD CiaxCX 200k”
